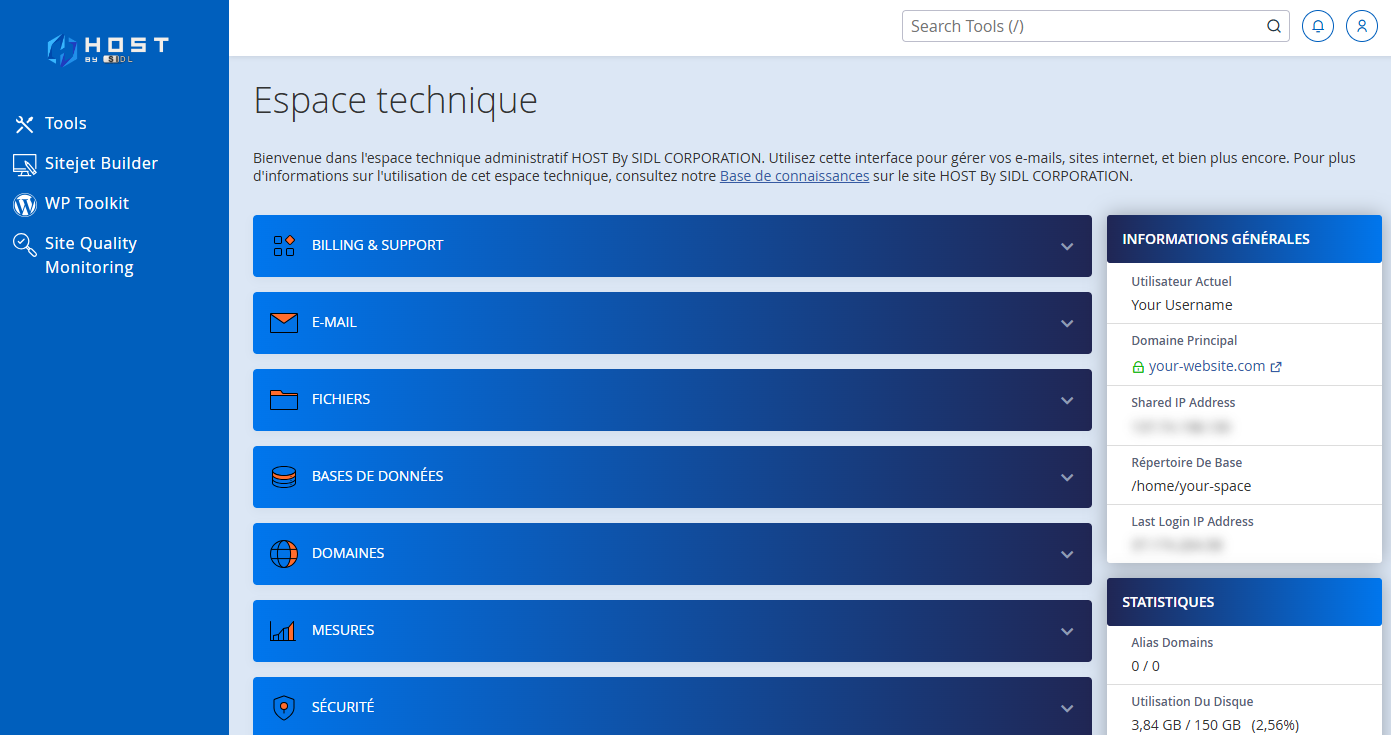
In the image above, after logging in, you will have access to your cPanel account. This space is the central hub for managing your web hosting. Here, you can manage your emails, SSL certificates, install websites, and even handle your databases. Depending on the web hosting plan you have subscribed to on our website, you will have access to different features based on your subscription, whether you are a beginner or an advanced user.
The different features:
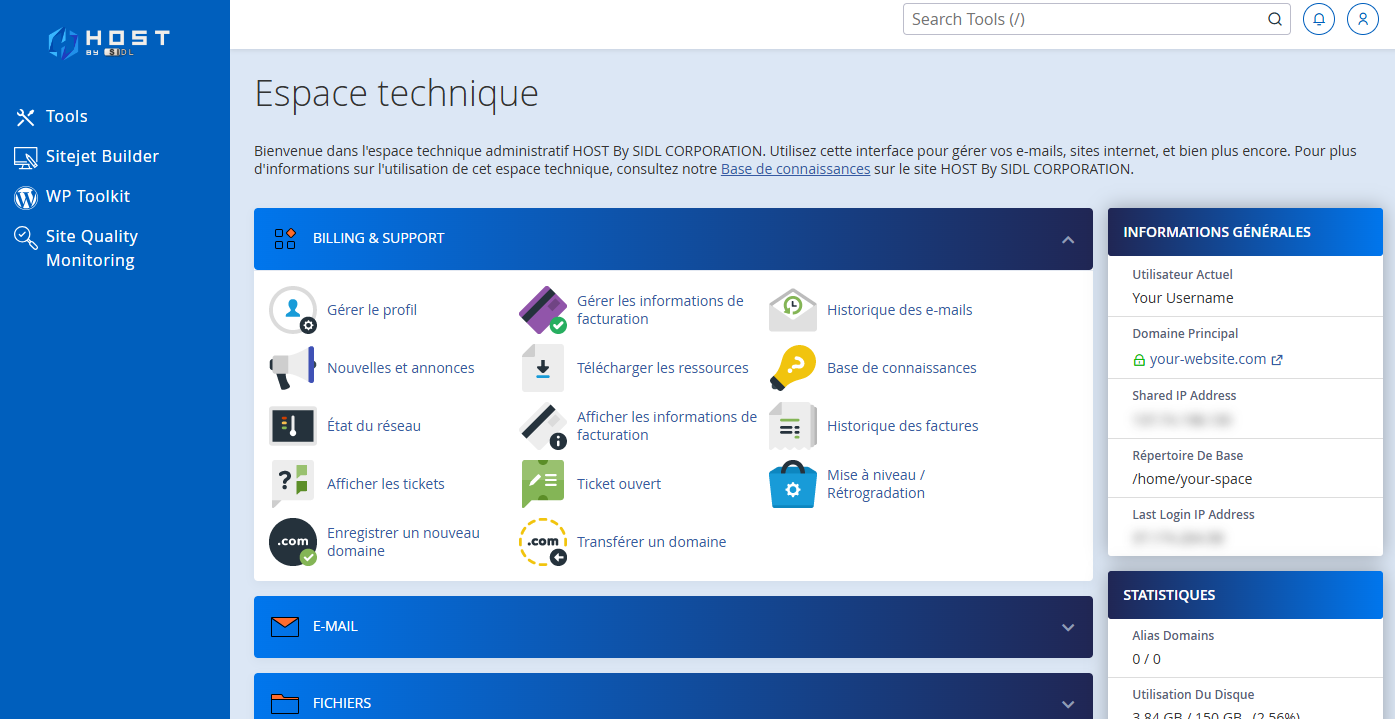
This section is specifically dedicated to managing your billing and accessing technical support. Here, you will find everything related to handling your payments, viewing your billing history, and contacting our support team when needed. If you encounter any issues or have questions, you can easily submit a support ticket or check our knowledge base for quick answers.
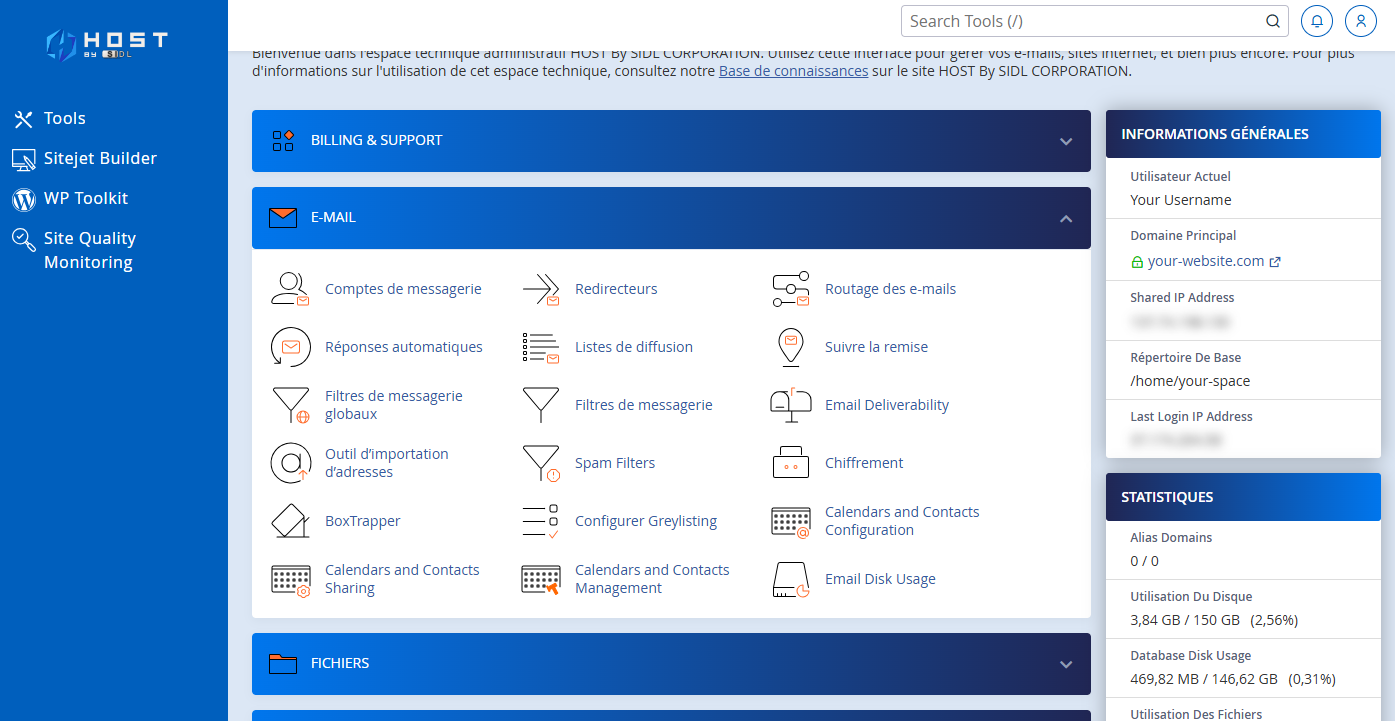
This section allows you to manage all email-related services. Here are some of the options available to you:
- Create new personalized email addresses for your domains,
- Set up email forwarding to automate incoming message management,
- Configure automatic replies to inform your contacts when you are unavailable,
- Create and manage mailing lists (feature available depending on your plan),
- Configure and manage the Greylisting system to add an extra layer of protection to your emails,
- And many more features to improve the management of your electronic communications.
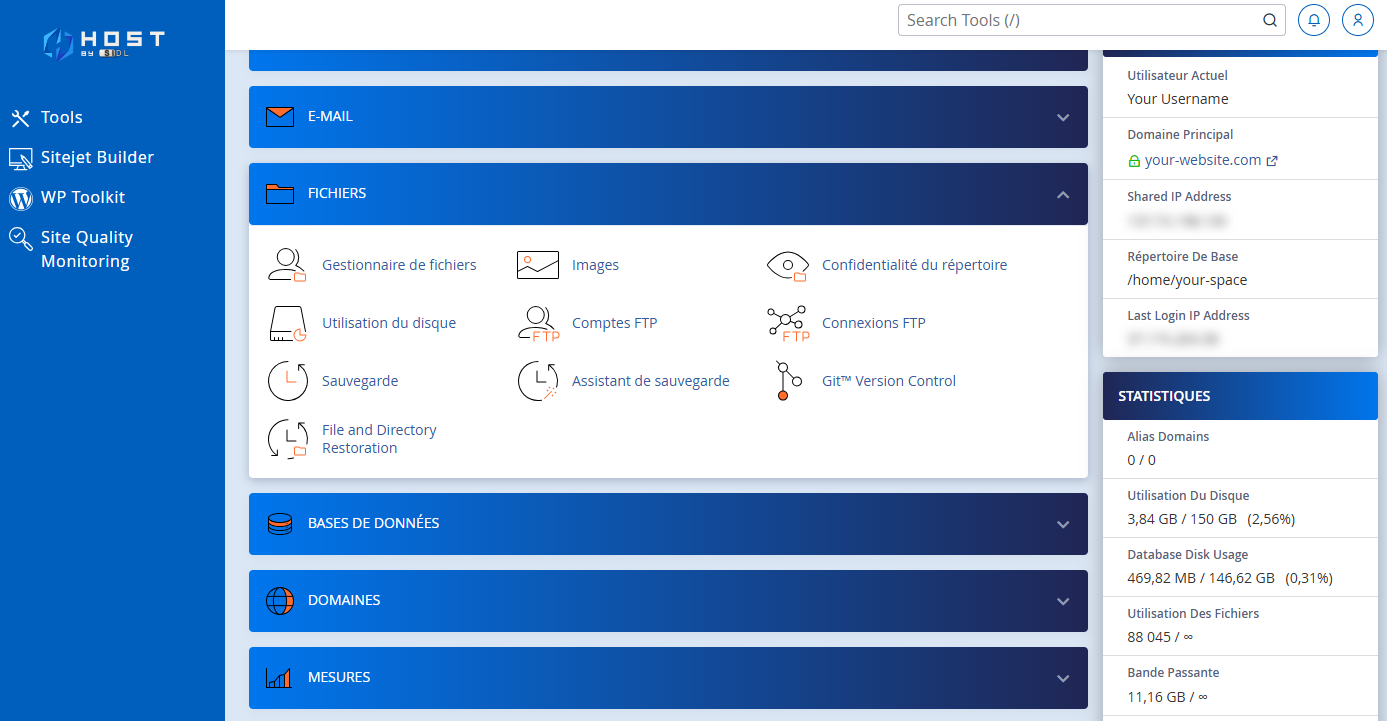
This section allows you to manage all the files hosted on your disk space. This is where you can organize the files necessary for your websites to function correctly. Depending on the plan you have chosen, you will be able to create one or more SFTP/FTP accounts to securely access your files. Additionally, this section enables you to manage directory privacy, perform regular backups, and restore your websites if any technical issues arise. File management is simplified so you can focus on what matters most: your online projects.
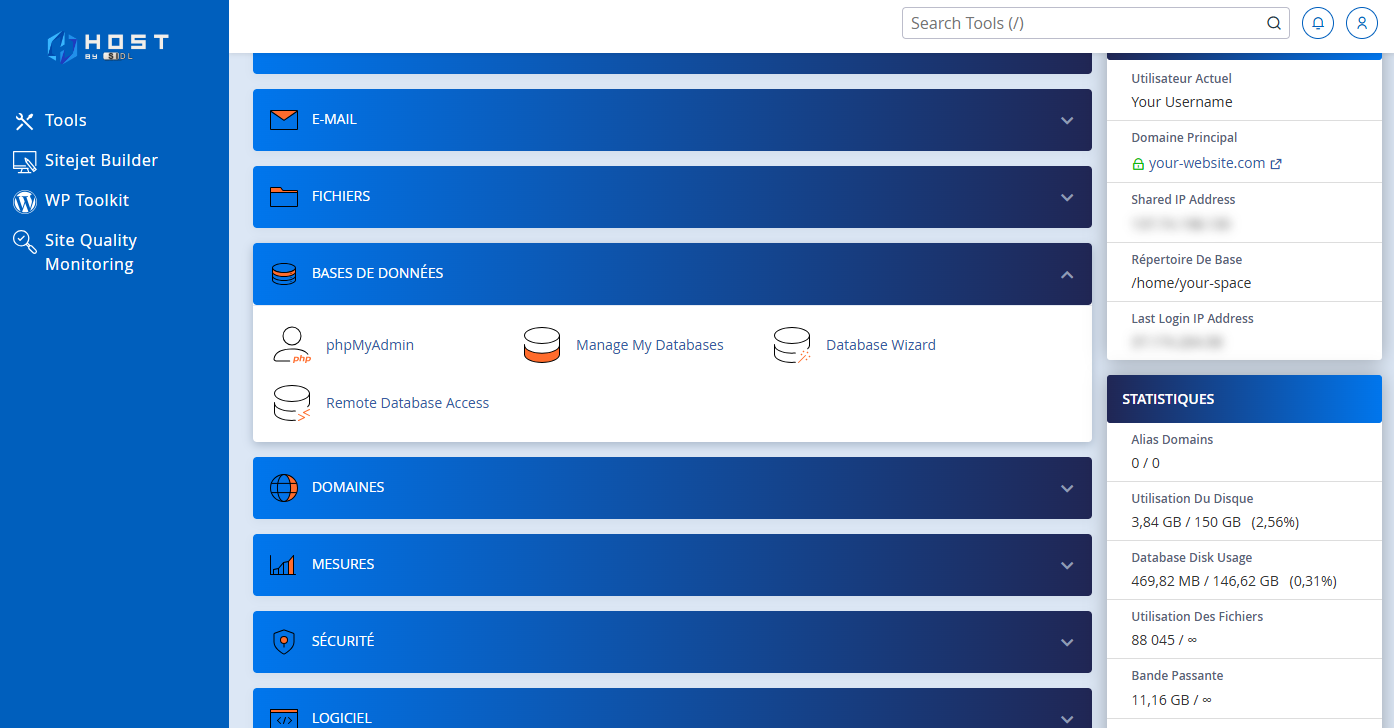
SQL databases are a crucial element for the proper functioning of many websites. In this section, you can create and manage the databases needed for your web applications. Whether you use WordPress, Joomla, or other CMS, you will need to connect your website to a database. The host address will generally be "localhost". Below is a PHP example to help you configure the connection between your website and the database:
<?php
$db_host = 'localhost';
$db_name = 'database_name';
$db_user = 'username';
$db_psw = 'password';
?>
A more detailed article will be available to guide you step by step in creating and managing your SQL databases.
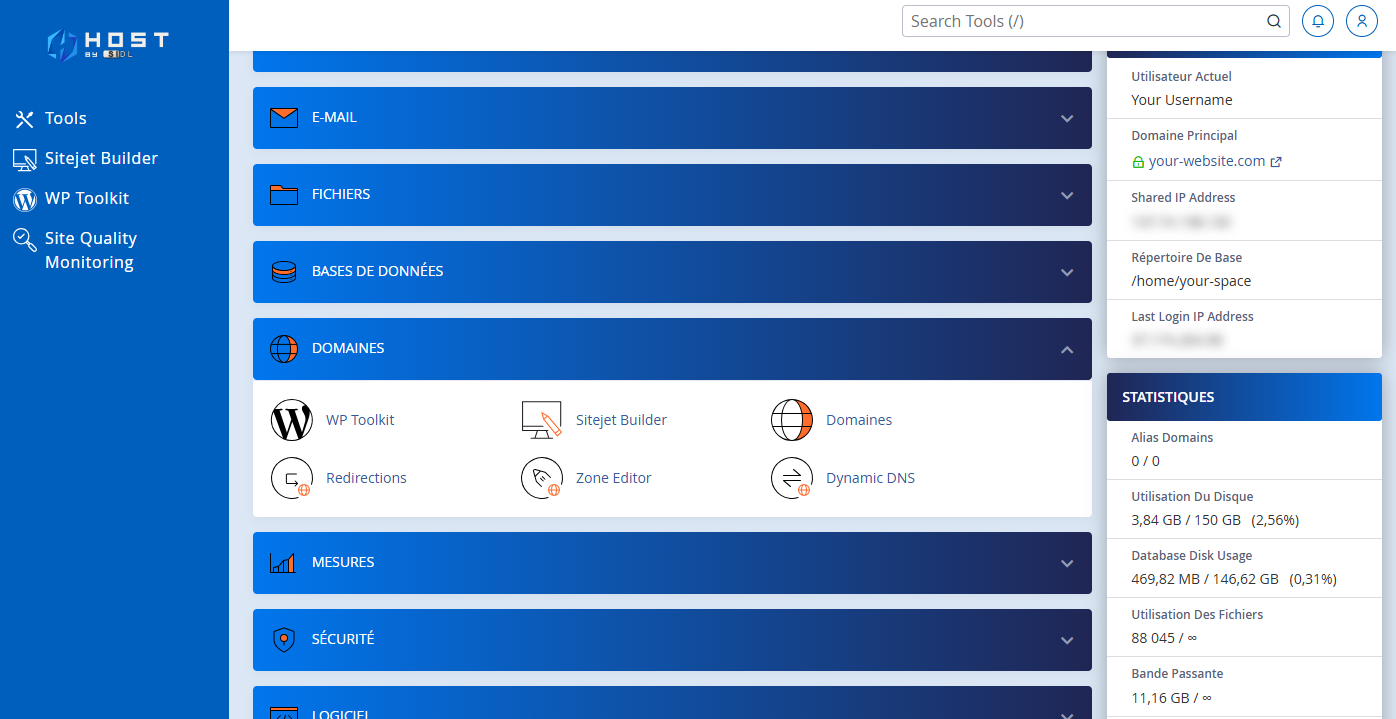
The management of your domains and subdomains is done in this section. You can add, delete, or configure your domains and subdomains according to your needs. We will soon publish a specific article explaining how to create a subdomain, allowing you to segment your services or host multiple projects on a single domain.
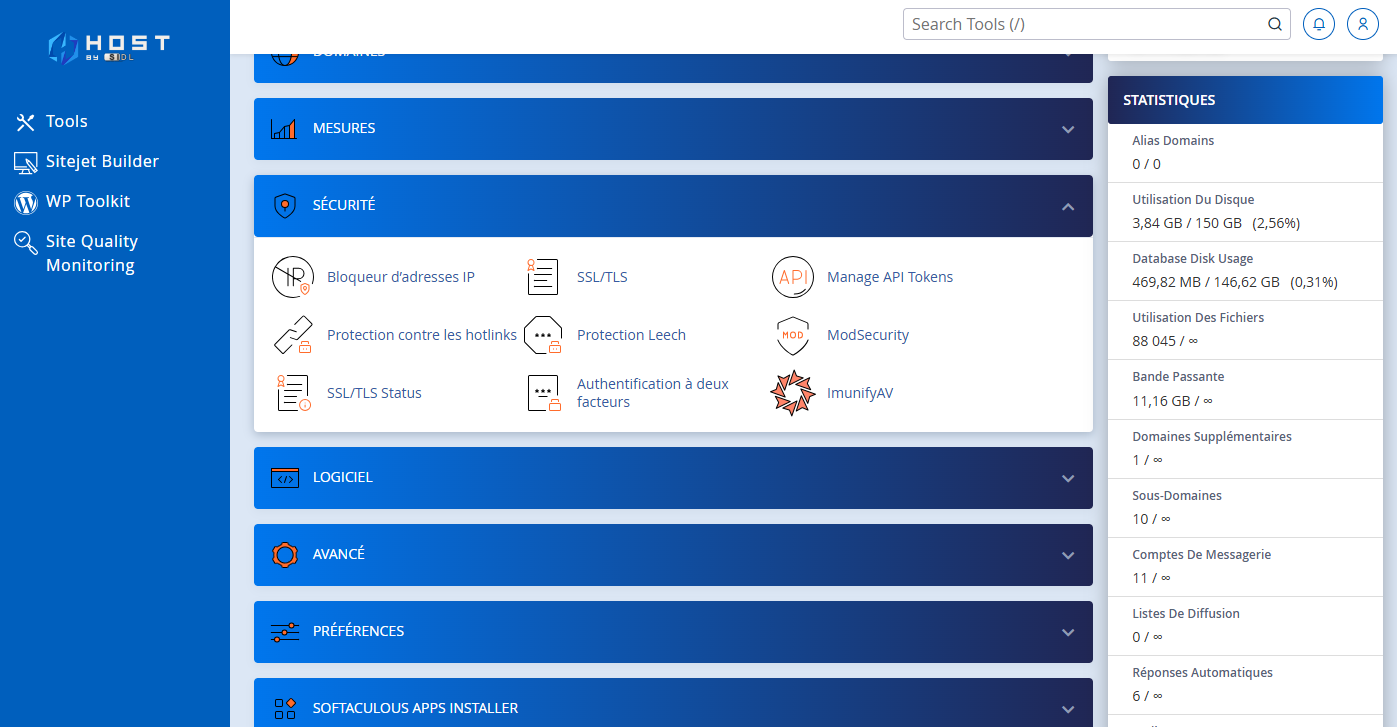
The security of your website and your data is a priority. This section is entirely dedicated to managing security aspects. Here are the features you can use to enhance your website's security:
- Block specific IP addresses to prevent unauthorized access,
- Manage and install SSL certificates to secure communication between your site and its users,
- Protect your files against hotlinking that could exploit your resources without authorization,
- Set up two-factor authentication (2FA) to strengthen account security,
- Depending on the plan you have chosen, you may have access to Imunify AV+, Imunify360, or Imunify Simple to protect your sites from malware.


